Step-by-Step DIY Pallet Decoration Ideas for Adding Rustic Charm to Your Home
Table of Contents
Introduction
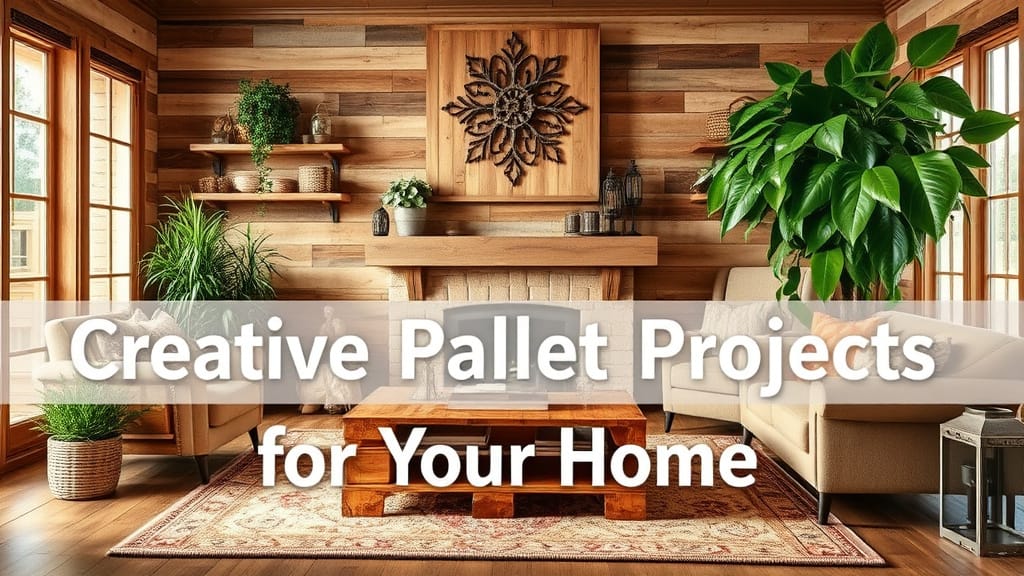
Rustic design continues to trend in 2025, with homeowners gravitating toward natural textures, reclaimed materials, and sustainable decor. One of the most accessible ways to embrace this style? DIY pallet projects. Pallets, once considered scrap, are now the backbone of chic, rustic home accents that add warmth and personality.
According to Houzz’s 2024 Design Trends Survey, searches for “pallet decor” rose by 35% over the past year, with DIYers embracing this affordable and environmentally friendly material. Whether you’re looking to craft a coffee table, wall art, or plant holder, wooden pallets offer a canvas for creativity.
In this post, we’ll explore step-by-step pallet decoration ideas that bring rustic charm into your home. From beginner builds to more advanced projects, you’ll find stylish, functional pieces that are easy to make and hard not to love.
In-Depth Outline
1. Why Use Pallets for Rustic Decor?
- Inexpensive or free from local stores, warehouses, or hardware shops.
- Versatile for furniture, storage, and decorative accents.
- Eco-friendly: repurposing wood minimizes waste.
- Easy to cut, stain, paint, or distress.
Table: Benefits of Pallet Wood for DIY Decor
| Feature | Benefit |
| Cost-Effective | Often free or low-cost to source |
| Durable | Typically made from hardwood |
| Customizable | Easy to stain, paint, or sand |
| Rustic Aesthetic | Naturally weathered, perfect texture |
2. Sourcing and Prepping Pallets
- Check local retailers, hardware stores, or Craigslist.
- Avoid painted or treated pallets (look for “HT” stamps for heat-treated).
- Clean with a wire brush and sand thoroughly to remove splinters.
- Use wood sealant or mineral oil for longevity indoors.
3. DIY Pallet Wall Art (Beginner-Friendly)
- Cut slats to size and arrange in chevron, mosaic, or plank pattern.
- Add a quote using stencils or decals.
- Optional: paint color blocks for a modern-rustic feel.
4. Pallet Coffee Table with Storage
- Stack two pallets and add wheels for mobility.
- Secure with screws and brackets.
- Add a glass top for a polished finish.
Table: Coffee Table Materials & Tools Checklist
| Item | Quantity | Use |
| Standard Pallets | 2 | Base and structure |
| Caster Wheels | 4 | Mobility and style |
| Screws & Drill | 1 set | Assembly |
| Sandpaper or Sander | 1 | Smooth finish |
| Optional Glass Top | 1 | Modern look + easy cleaning |
5. Vertical Pallet Garden (Perfect for Small Spaces)
- Lean or mount a pallet vertically.
- Staple landscape fabric to form planting pockets.
- Great for herbs, succulents, or flowers on patios or balconies.
6. Pallet Shelving Units and Crate Storage
- Use single slats or half pallets to make floating shelves.
- Combine with crates for modular storage.
- Ideal for entryways, kitchens, or bathrooms.
7. Rustic Pallet Headboard with Lighting
- Cut pallet wood to fit bed width.
- Attach vertical slats to a horizontal brace.
- Add string lights, sconces, or Edison bulbs for ambiance.
Table: Headboard Sizing Guide by Bed Size
| Bed Size | Headboard Width | Suggested Height |
| Twin | 39″ | 36–48″ |
| Queen | 60″ | 48–60″ |
| King | 76″ | 60–72″ |
8. Decorative Pallet Signs and Seasonal Decor
- Create interchangeable signs for holidays or seasons.
- Paint or stencil messages like “Welcome,” “Gather,” or “Joy.”
- Hang with twine, ribbon, or rustic metal brackets.
Detailed Content Expansion
3. DIY Pallet Wall Art (Beginner-Friendly)
If you’re just starting out with pallet projects, wall art is the perfect place to begin. It’s low-risk, easy to personalize, and adds instant rustic character to any room.
Step 1: Disassemble the Pallet
Use a crowbar or reciprocating saw to remove the slats from the pallet base. Choose the best-looking pieces with interesting grain or natural distressing.
Step 2: Cut and Sand
Cut slats to your desired dimensions. For a chevron or herringbone pattern, use a miter saw to cut 45° angles. Sand all edges thoroughly to avoid splinters.
Step 3: Arrange and Assemble
Lay the slats on a plywood backing or attach them directly to the wall with finishing nails or construction adhesive. Arrange them in your chosen pattern—plank, zigzag, or offset brick.
Step 4: Add Artistic Elements
Stencil on a meaningful quote or add painted shapes. You could also use wood burning tools for a natural, etched look.
Table: Wall Art Design Options
| Style | Best Room | Tools Needed |
| Chevron Pattern | Entryway, hallway | Miter saw, wood glue, nails |
| Quote Sign | Bedroom, kitchen | Stencils, paint, sealant |
| Color Block | Living room, office | Painter’s tape, brushes |
Pro Tip: Apply a matte polyurethane sealer to preserve wood tone and prevent dust accumulation.
5. Vertical Pallet Garden (Perfect for Small Spaces)
Short on yard space? A vertical pallet garden is a functional and decorative way to bring greenery into small outdoor (or even indoor) areas.
Step 1: Choose the Right Pallet
Pick a pallet that stands upright evenly and is free from chemical treatments (look for “HT” stamped wood). Clean it well and sand any rough edges.
Step 2: Create Planting Pockets
On the back of the pallet, staple layers of landscape fabric between slats to form planting “pockets.” Ensure each pocket is deep and secure enough to hold soil.
Step 3: Add Soil and Plants
Turn the pallet upright, and fill each pocket with potting soil. Insert herbs, succulents, or shallow-rooted plants like pansies or lettuce.
Step 4: Position and Water Carefully
Place your vertical garden in an area with suitable sunlight. Water gently to avoid washing out the soil from the top layers.
Table: Ideal Plants for Vertical Pallet Gardens
| Plant Type | Sun Requirement | Notes |
| Basil, Parsley | Partial Sun | Great for kitchen gardens |
| Succulents | Full Sun | Low-maintenance & colorful |
| Ferns, Ivy | Shade | Lush texture for indoors |
Pro Tip: Add small chalkboard labels or painted markers to identify your plants.
Conclusion
DIY pallet projects are an excellent way to add rustic charm to your home while staying budget-conscious and sustainable. Whether you’re creating a striking headboard, functional storage, or simple wall decor, pallets offer incredible flexibility and character.
By following these step-by-step ideas, you can turn reclaimed wood into stylish, one-of-a-kind pieces that reflect your creativity and design sense. With just a few tools, some prep work, and a touch of inspiration, your home can feel warmer, cozier, and more you.